Creating a Trigger
Triggers watch for changes in your data and act on it following your instructions. Before you begin, it's good practice to plan what business process you're trying to achieve and which actions you'll need to use, perhaps along with other processing functions such as AutoResponders and Notifications. You can also run a trigger from a workflow.
It's useful to understand the terminology and hierarchy of what you will be creating. A Trigger Profile:
- has a name
- has rules for whether to run on update or creation
- has rules to define an initial and a change state
- contains one or more actions
A Trigger Action sits within a profile and:
- has a name
- has rules for when to run
- does one of 12 things
Depending on your business requirements, you could have several profiles; each one made up of several actions.
-
With your form open, choose Triggers from the Post Processing menu, or, from the Logiforms Start Menu, choose Database Tools > Trigger Processing Actions, select your form and click OK. The Trigger Profiles window displays.

-
Click Add Trigger Profile to begin creating a new profile.
-
The Trigger Wizard panel displays. Click Next to continue.

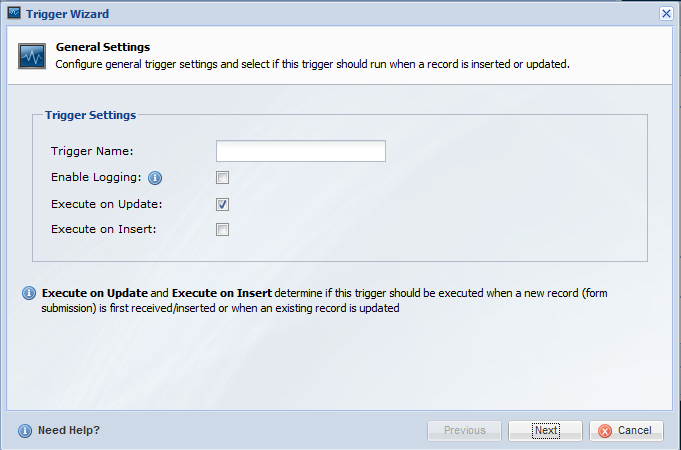
- The General Settings panel appears.
-
In the Trigger Name field, enter a meaningful name for this profile. To make it easier for you or others to maintain this trigger, you may find it useful to describe the business process you are automating, such as ‘CustAck01’ for example. You can always rename it later.
- We recommend that you select Enable Logging when you first create and test your trigger profile. If you do so, every step of the trigger processing will be recorded, and this will help you understand what is going on and will help you determine if you need to troubleshoot this trigger. Later, when you're ready to put this into production, you should return and unselect Enable Logging to disable the function.
- The next two options determine when you want this trigger to run. Depending on your business requirements, you can choose from these options:
Execute on Update Execute on Insert This Trigger Profile Runs ... Yes No only when an existing record is updated No Yes only when a new record is created Yes Yes when a new record is created or when an existing record is updated No No only when manually triggered via a workflow -
Click Next to continue.
-
The Trigger Execution Rules panel displays.
-
-
Typically, you need a trigger to run when one or more fields in a record change. For example, if a status field in a record changes from "sent" to "received", that action can be used as a rule in this trigger to initiate a chain of events, from sending emails to moving this record to another database. Use this panel to define the initial state of the field and what it must change to before this trigger runs. For both Initial State and Change State, click Edit Rule and use the standard Logiforms Rule screen to select one or more fields and the settings that determine when this action will run.
NOTE: If you you selected Execute on Insert on the previous panel and are running this trigger profile only when a new record is created, click Next to continue to the next panel. It’s unlikely your new record will have any changed field, but the Change State Rule is available should you need it.
-
Click Next to continue.
-
On the Trigger Actions panel, click Add New Trigger Action.
-
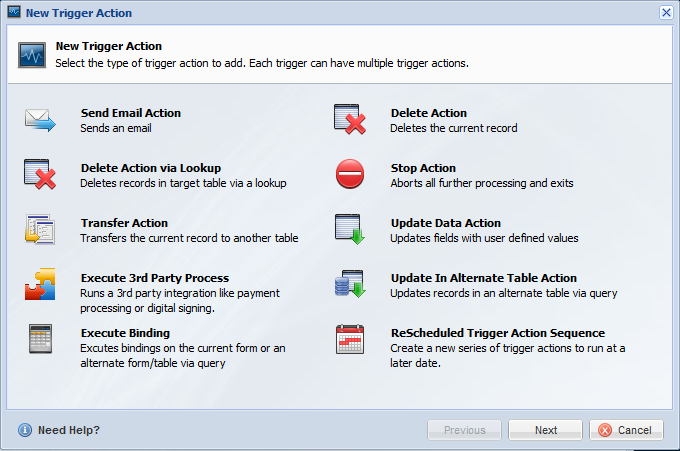
The New Trigger Action panel displays.
-
- Choose one of the 12 actions and click Next.

- Send Email Action
- Update Data Action
- Update in Alternate Table Action
- Transfer Action
- Transfer Multiple Action
- Delete Action
- Delete Action via Lookup
- Execute a 3rd party Process
- Execute Binding
- System Process
- Cancel Pending Adobe Sign Agreement
- Send Signature Required Reminder
- Mark Comparison History Viewed
- Rescheduled Trigger Action Sequence
- Stop Action
- After you set up the action with its name and its rules, click Finish. You are returned to the Actions tab of the Trigger Wizard. Depending on your requirements, you may need to add another action, create another profile, or begin testing.
Next Steps
Managing Triggers
0 Comments