Trigger Action - Update Data In Another Table
There may be times when you need to update a field in another table in order to satisfy your business requirements.

Before you begin, be sure that you have created the destination table and tested it by adding at least one record.
- On the Trigger Actions panel, click "Add New Trigger Action". Depending on your starting point, you may need to select a profile, click "Edit Trigger Profile", and then click the Actions tab. The New Trigger Action panel appears.
- Click "Update in Alternate Table Action" and click Next.
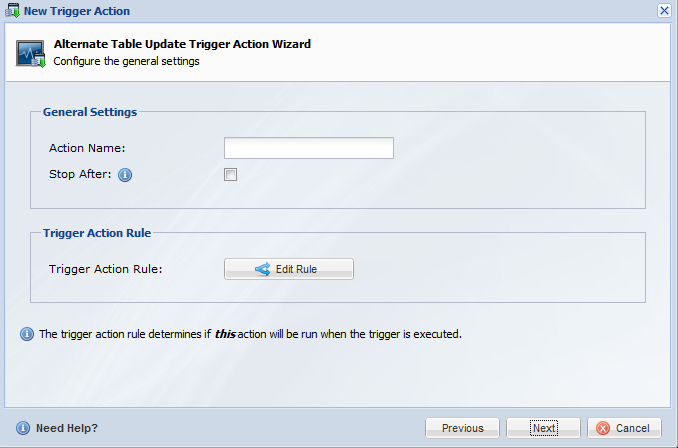
- Note the description of this trigger and click Next. The "Alternate Table Update Trigger Action Wizard" panel appears.

- In the Action Name field, enter a descriptive name for this action.
- If you want to stop all other trigger actions after this profile runs -- if this is the last action you plan to run -- check Stop After.
Prioritize Execution Checkbox
When checked, this action will execute immediately, and not wait until other actions and events that are part of this request are completed.
This should only be used in particular scenarios and is typically not required.
For example, when checked, the recordID (on an insert) would not exist and would not be available. If an update trigger action followed this one, the changes from that action would not be applied yet, and PDF document generation would not be complete etc. This setting should be reserved for use only when the default (unchecked) is not working for your specific usage.
- Click Edit Rule and use the standard Logiforms Rules screen to select one or more fields and define the settings that determine when this action will be run.
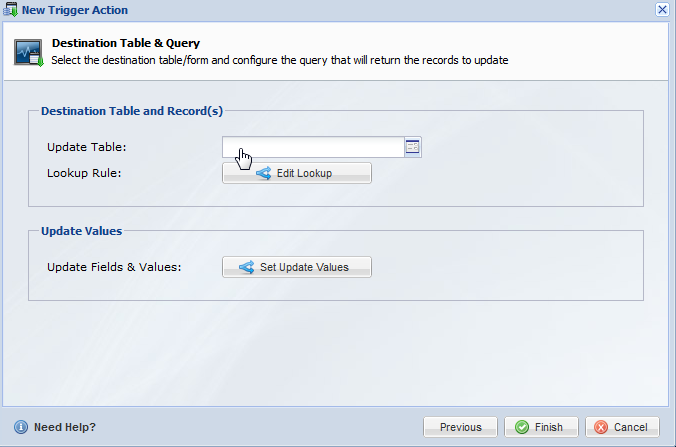
- Click Next. The "Destination Table & Query" panel appears.

- In the Update Table field, click and choose the name of the form you want to update from the dropdown list.
- Click Edit Lookup and use the standard Logiforms Rules screen to select one or more fields and define the settings that determine when this action will be run..
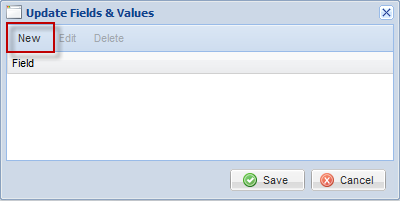
- Click "Set Update Values". The Update Fields & Values screen appears.

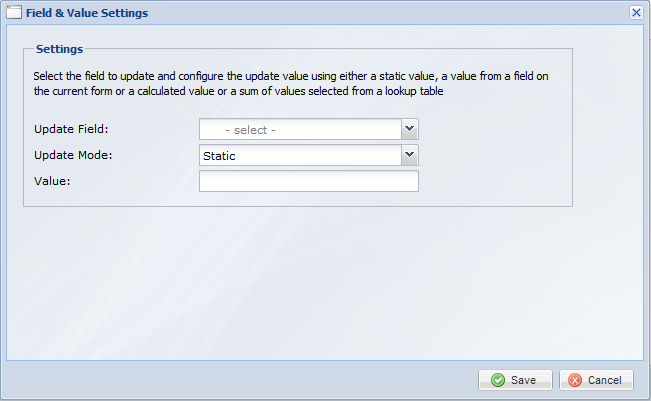
- Click New. The Settings screen appears.

- In the Update Field dropdown list, choose the field you want to update.
- In the Update Mode field, you have four choices for how to update this field. Depending on the one you choose, your options change as follows:
-
Mode Details Static a Value field displays; enter the text you want used to update the defined field in the destination table Use Form Field Value a dropdown list named Value field displays fields from your source form; choose a field from the list Calculated Value click Calculation; in the Calculated Update Value box, enter your expression; you can use wildcards from either the source or the destionation table; click Save Sum four fields appear. in "Sum Value Source" click and select the form that provides the source for the sum; in "Sum Source" field, choose a field from that form; in Sum Mode, choose whether you want to Add, Multiple, or Join Strings Values; in "Sum Value Lookup Rule" click "Edit Sum Rule" and use the standard Logiforms Rule screen to select one or more fields and define their settings. - Click Save. You are returned to the "Update Fields & Values" panel. It displays the field name you have defined to be updated.
- Click Save to return to the Destination Table & Query panel.
-
Click Finish to return to the Trigger Actions panel.
Next Steps
Click Finish to return to the Trigger Profiles panel or click "Add New Trigger Action" to add another action to this profile.
If you need to edit or delete a trigger action or profile, see Managing Triggers.

0 Comments