Try It Yourself: Creating a Sub User Account
Learn how to create a sub user account who can access your data
Try it Yourself
- Select
 Sub User Account Manager from the
  Main Menu.
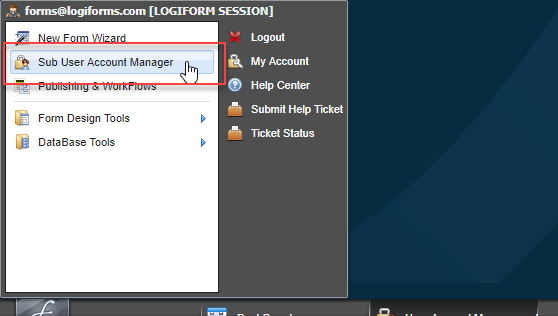
- The New Sub User Wizard window opens.
- Click the Next button to continue.
- Click the
 'expand' icons to expand and select the Sample Project > Users folder, then click
  New Sub User Group Folder.
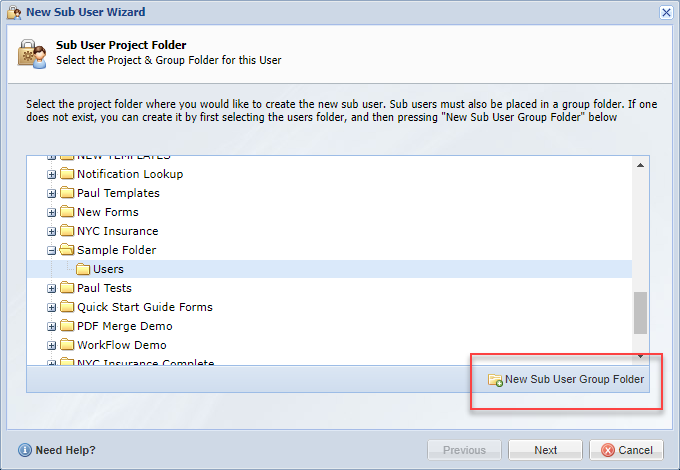
- The New Sub User Group Folder dialog opens.
- The New Sub User Group Folder dialog opens.
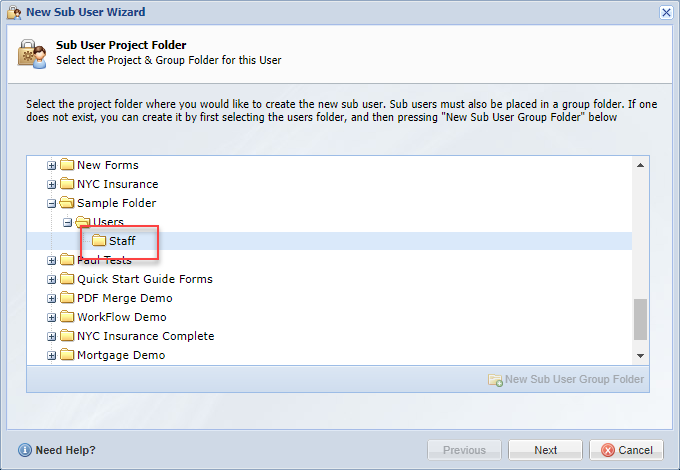
- Enter 'Staff' as the New Sub User Group Folder name, then click the OK button.
- The Staff folder displays as a sub folder to the Users folder.
- Click the Next button to continue.
- Next, you are asked to choose between a
 Data Only User or a
  Form Creator User.
- For this example, we're going to create a
 Data Only User who will only have access to data.
- Click the Next button to continue.
- Enter the Sub User Settings (Sub User Name, Email, Username) for the new sub user and choose a Password for them. You can leave the Theme setting blank for this demonstration.
- After entering the Sub User Settings for the new sub user, click the Next button to continue.
- Now we can define Project & Form Permissions. Click the
 Launch Permission Editor button.
- The Permission Editor window opens.
- The Permission Editor window opens.
- Click the
 'expand' icon to expand the Sample Project folder. Select the check box for Sample Form.
- This grants the user access to the data from this form.
- This grants the user access to the data from this form.
- We can also restrict access to a subset of data using the DataView created in the previous step. Select the check box for Restrict Data Access, then click the Configure Data Access button.
- The Data View Properties dialog opens.
- The Data View Properties dialog opens.
- From the Primary View drop down, select the Home Insurance DataView created in the previous step.
- By setting the Primary View to a DataView, you can restrict what the sub user can view. Additional views can be assigned but are not necessary.
- By setting the Primary View to a DataView, you can restrict what the sub user can view. Additional views can be assigned but are not necessary.
- Click the
 Save button on the Data View Properties dialog, then click the
  Save button on the Permission Editor.
- Click the Next button to continue.
- On the Sub User Account Permissions screen, keep all the default values, and click the
 Finish button to complete setup of the new sub user.
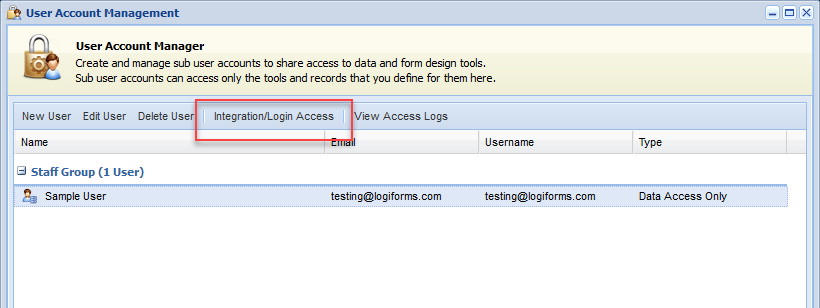
- The new sub user account is now created and shown within the User Account Manager window.
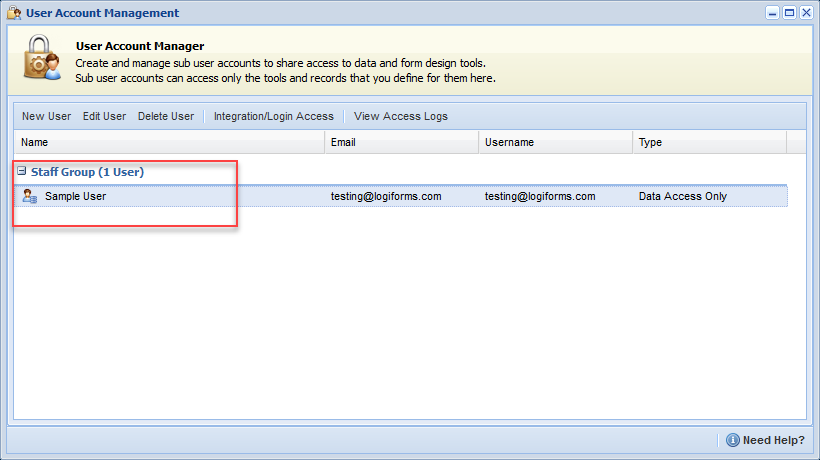
The sub user can log in at the same Logiforms URL you use for your main account (https://forms.logiforms.com/app/). If desired, for a more non-branded experience, and to include any assigned theme, you can use the Integration/Login Access button in the toolbar to get a unique URL for your sub users.
Have more questions? Submit a request
Please sign in to leave a comment.

0 Comments