Try It Yourself: Creating a DataView
In this video, you'll learn how to create a DataView to show specific columns with a filter applied.
Try it Yourself
Let's walk through the process of creating a DataView. For this tutorial, we're going to use the Sample Form that is provided in all new accounts. It has 50 pre-existing records in the database that we can use for this example.
Opening the Database View
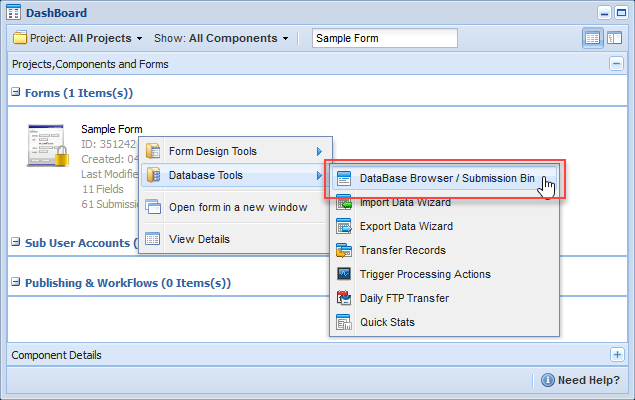
- From your dashboard, mouse over the Sample Form icon and choose Database Tools > Database Browser / Submission Bin.
Creating the DataView
- In the top left corner of the Database Browser, click
 Data Display Views, then select Create & Manage Views.
- The Data Views window opens.
- The Data Views window opens.
- Click New to open the Data View Wizard, then click the Next button to advance the Wizard.
- Enter 'Home Insurance' for the Profile Name and keep the default values for the rest of the settings.
- Click the Next button to advance.
Next, lets edit the columns that are displayed, and change the display order from left to right:
- Click the Edit Column Config button.
- The Column Config Settings window opens.
- The Column Config Settings window opens.
- Scroll to the bottom of the Column Config Settings window and change the Display Mode property for Comments, International Phone, Zip, Address, City and Country Field to hidden. For this example, we're going to hide those columns in this view. The configuration should like this:
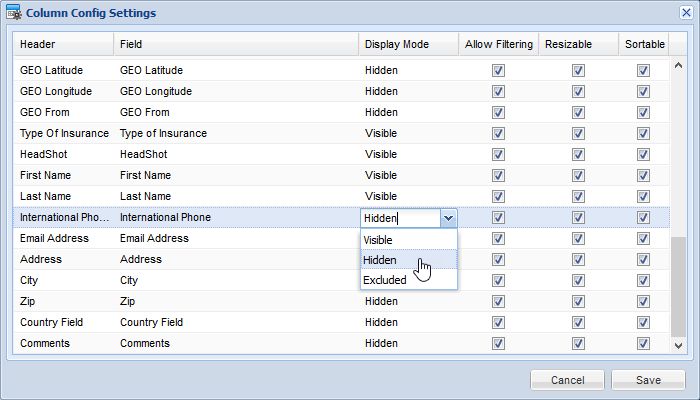
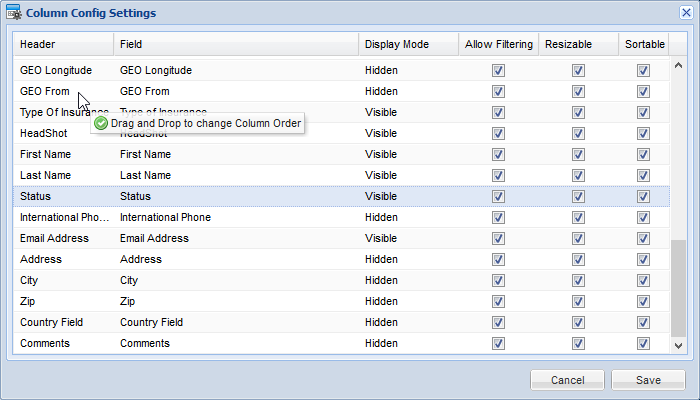
- Next, let's move the Status field up, so that it comes before Type of Insurance. Drag and drop the Status column above Type of Insurance.
- Click the Save button to save your changes.
- Next, let's create the filter that will return only the 'Home Insurance' records.
- Click the
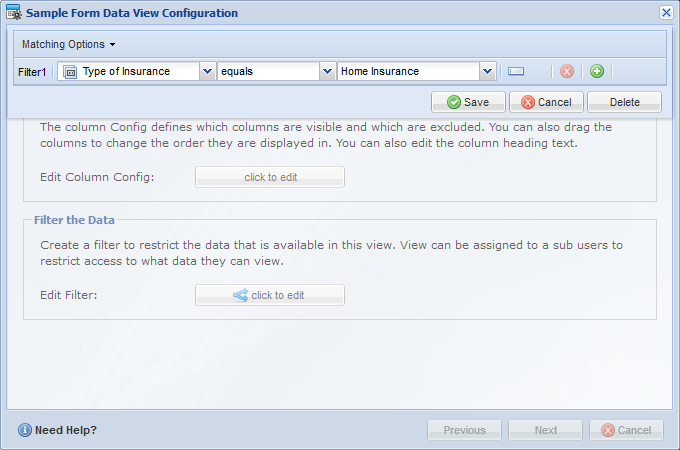
 Edit Filter button to display the Matching Options fields, and create a filter that selects records where 'Type of Insurance - equals Home Insurance' as shown below:
- Click the
 Matching Options - Save button, and then click the Next button.
- Let's also group the output by country.
- Select the Group Settings check box, then choose Status from the Group By menu.
- Click the Next button to advance through the next three screens and keep the default values. Click the
 Finish button to save.
- Finally, click the Close button to close the Data Views window.
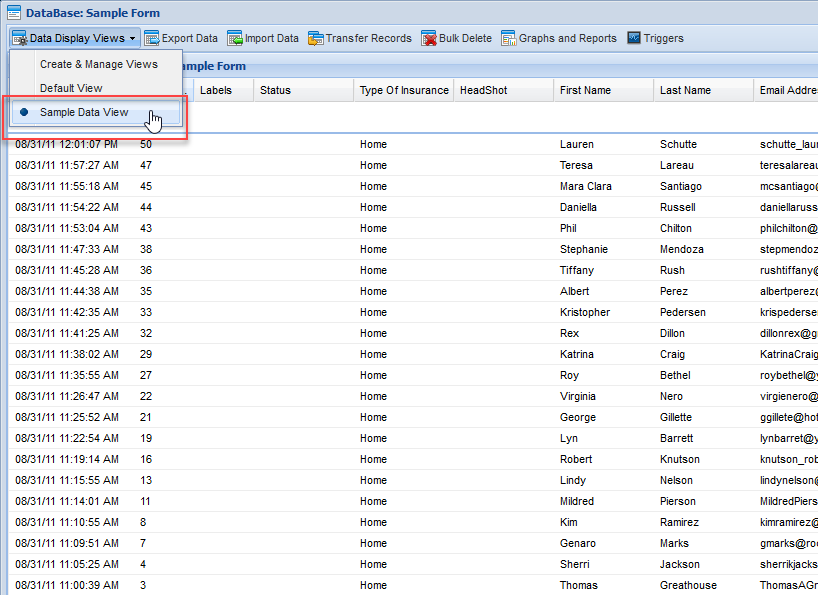
- Back in the Database View, you can now select the new 'Home Insurance' DataView from the
 Data Display Views menu, and you'll see the data filtered to show only Home Insurance and grouped by the status field.
Have more questions? Submit a request
Please sign in to leave a comment.


0 Comments