Try It Yourself: Create Your First Workflow
In this video, you'll learn how to use the Workflow Wizard to create your own web portal to share data.
IMPORTANT! Before you begin this tutorial, make sure the 'Sample Form' is not open in the Form Designer. If it is, simply close the Form Designer window.
Try it Yourself
- Select (G) Publishing & Workflows from the Main Menu, or click the workflow icon on the desktop.
-
Workflows are included at no additional cost with Enterprise plan subscriptions, and are offered as a $9.99 add-on for Pro plan users. If your plan is below the Enterprise level, you'll be asked to start a free trial (which does NOT auto-upgrade) to see if workflows are right for you. Click 'Start Your 30 day trial now" to continue.
- The New Publishing & Workflows Wizard window opens.
- Click the Next button to continue.
-
Next, enter 'My Staff Portal' as the Profile Name.
- Click the (G) 'folder' icon, choose the Sample Project folder, and click the
 OK button.
- Click the (G) Datasource icon and choose Sample Form.
- This is the form we want to use in our workflow.
- This is the form we want to use in our workflow.
- Leave the Header Graphic text box blank, and click the Next button to continue.
- You'll get Form Selection Warning, advising that the form we're publishing is not secure.
- You'll get Form Selection Warning, advising that the form we're publishing is not secure.
- Click the Make Form Secure & Continue button to automatically apply SSL to the form.
Next, we can decide if we want to secure access to our workflow with a login page. The Member database (the database of all the login accounts) can be automatically created for you on the fly here, or you can select any of your forms that have the username & password field.
- Select (G) Automatically Create the Login Page & Member Database and click the Next button to continue.
- The next page explains that a new form will be created and that a single record will be added to the new form's database with the username 'admin' and password 'password.' This is test/sample account that you can change later.
- Click the Next button to continue.
- The next step in the wizard asks if you want to Manually set up the workflow, or use a wizard that will guide you through configuring the setup.
- Choose the 'Add, Edit & Delete Wizard' and click Next.
- Leave all the default settings and Click Next.
- Next, choose the columns to include in the layout by pressing CTRL + click. After selecting a few columns, click Next to advance.
- On the "Edit Record Settings' screen, leave all the defaults and click Next.
- On the Add New Record screen, leave all the defaults and click Next.
- On the 'Delete Record Settings' screen, leave all the defaults and click Next.
The new workflow is created and loaded into the Workflow Designer! Because you selected the Add, Edit & Delete Wizard, the basic functionality to add, edit and delete records was automatically created. And, because we selected Automatically Create the Login Page & Member Database, a member database was automatically created and the workflow secured.
Test the Workflow
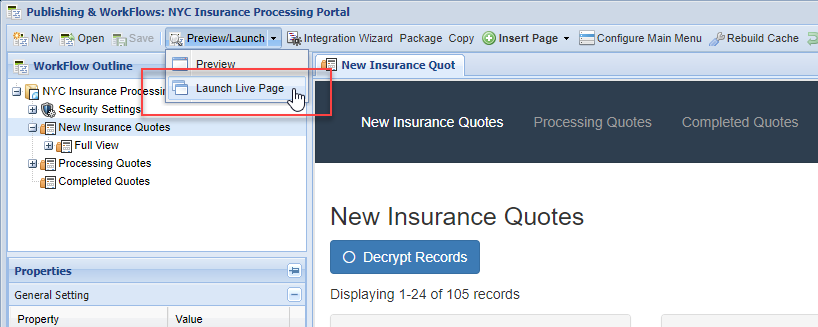
- Choose 'Launch Live Page' from the Preview/Launch Menu.

- Log-in using the default assigned username and password (username 'admin' and password 'password').


0 Comments