Edit Page
Edit Pages are used when you want to allow the end user to edit the records they are viewing. This is done by first creating an Edit Page, and then linking to the Edit Page from the parent Date Page. When you create an Edit Page you can select which fields you want to display on your form and also use Form Views to display a unique representation of your form.
Creating an Edit Page
Right click on a Data Page in the Workflow Outline Panel and select Insert New > Edit Page.
- Enter a name for the new Page
- If the corresponding form has Form Views defined, select the Form View to use on this Edit Page. Note: this option is only visible if your form has Form Views defined.
- If you plan to create multiple "Fieldsets" or "views" of this edit page, in order to display a different set of editable fields based on either the selected record or the currently logged in user, click the Edit Field Set Rule button to configure the corresponding rule for this Fieldset. FieldSets are explained in greater detail below.
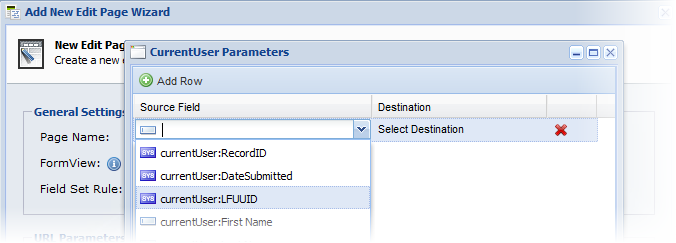
- Under URL Parameters you can set values to be pre-populated into the Edit Form. These settings will override any existing values in the record. If your Workflow is secured, you can pass in any of the CurrentUser Variables. Static values can also be configured and set on the Edit Form

- On the next screen, select any fields to exclude from the Edit Page and choose whether they should be hidden or shown as disabled.
- Click Finish to complete the Edit Page Setup Wizard.
Linking to an Edit Page
After creating the Edit Page, it is NOT automatically linked to the parent page. See Linking to an Edit Page for instructions on how to link to the Edit Page from the parent page.
Creating Multiple Edit Page Views with FieldSets
After completing the initial setup of an Edit Page, you'll have the option of creating multiple "FieldSets". FieldSets allow you to attach rules to your Edit Page to determine how the Edit Page should be displayed. Using FieldSets you can, for example, display all of the fields to a logged in Administrator for editing, but only show a few simple fields to a user logged in with fewer privileges. This is done by selecting fields to exclude from view or by using a different Form View for each FieldSet profile you define.
You can create as many FieldSets as needed. An Edit Page must, by default, have at least 1 FieldSet.

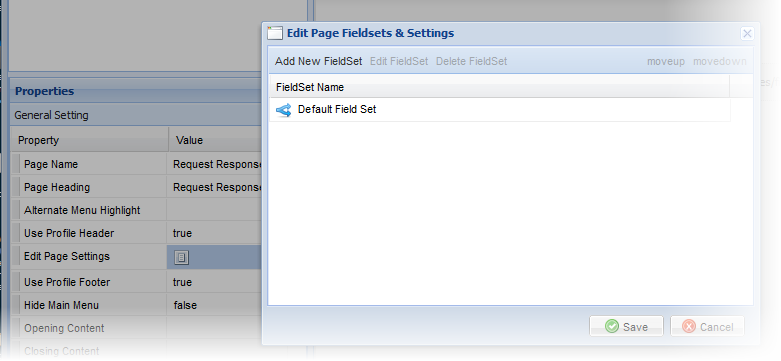
To create additional Fieldsets and/or Manage the Edit Page settings. Click the Edit Page Settings Property in the General Settings Panel.
Edit Page Properties
In addition to the common page properties, Edit Pages have the following properties/options:
General Settings
| Property | Description |
|---|---|
|
Edit Page Settings |
Click the icon next to this property to launch the Fieldsets window to configure one or more FieldSets for use on the Edit Page. |
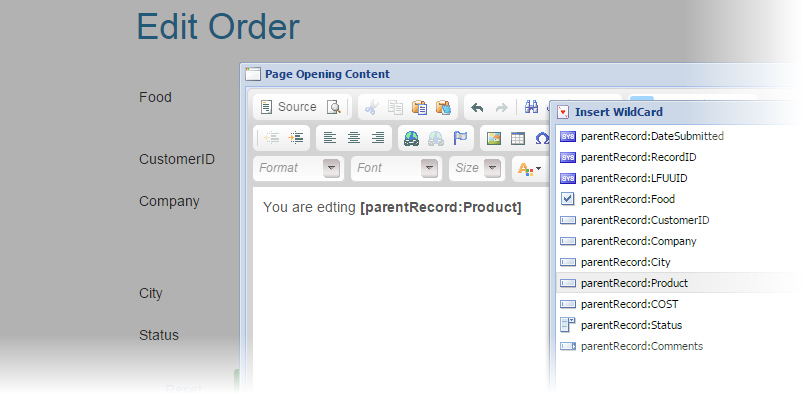
| Opening & Closing Content | The opening and closing content on Edit Pages provide access to [ParentRecord] wildcard values. These values can be used to display information about the record being edited above the form.  |
AutoResponder Thank You Pages and WorkFlow Edit Pages
You can set up autoresponders to show a message after and edit page/form is submitted as part of the workflow. You can use an AutoResponder Rule to determine what will be shown by using the Form Display Mode property and selecting WorkFlow - Edit Page. There are also several other Form Display Mode filters you can use to control which autoresponder is used.
Linking Back to the Previous Page via an AutoResponder Thank you Page
On the AutoResponder Thank you Page, shown after an edit page/form is submitted, you can include a special link that will go back to the page before the edit page. For example, if you were browsing a set of records and clicked to edit one of the records, then submitted the form with changes, this link format would take you back to the recordset at the correct location.
To use this link switch to source code mode and insert an HTML anchor tag using this format:
<a href="//workflow.back">Return to Records</a>

0 Comments