Try It Yourself: Create a PDF from a Form Submission

Watch the following video to learn how to generate a PDF name badge for each new form submission.

Try it Yourself
- From the dashboard, mouse over the 'Event Registration Form' created previously and choose Form Design Tools > Form Designer to open the form in the Form Designer.
- In the Form Outline panel, click the 'HeadShot' field.
- The Properties panel updates to show the global Field Properties.
- The Properties panel updates to show the global Field Properties.
- In the Properties panel, under Form General Setting, find Resize Image and change it to true.
- This will ensure the uploaded image is the right size for our name badge.
- This will ensure the uploaded image is the right size for our name badge.
- Set the Image Width to '300' and Image Height to '200.'
- Click the
 Save button in the toolbar to save your changes.
Now let's create the Dynamic PDF.
- From the
 Post Processing menu in the toolbar, choose
  PDF Generation.
- The PDF Templates window opens.
- The PDF Templates window opens.
- Click the
 Create New Template button.
- The New PDF Population Template Wizard opens.
- Click the Next button to continue.
- Choose
 Dynamic PDF Document, then click the Next button to continue.
- Enter 'Name Badge' for the Profile Name.
- Under Page Layout, change the Page Type to Custom.
- Enter a Width of '5' and Height of '3' to create a small printable name badge, 5 x 3 inches.
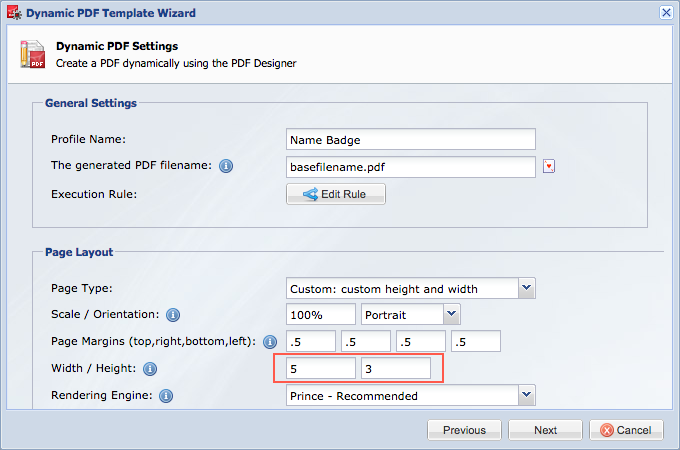
- Select the Alternate Rendering Engine from the Rendering Engine drop down.
- Click the Next button to continue.
- Change the value for the Update Option to true.
- This means the PDF will be regenerated any time the record is updated.
- This means the PDF will be regenerated any time the record is updated.
- Next, we need to select the field where a reference to the PDF file will be saved. Enter 'Name Badge' for the New PDF Field Name.
- Click the Next button to continue.
- Keep the default values for Security Options and click the Next button.
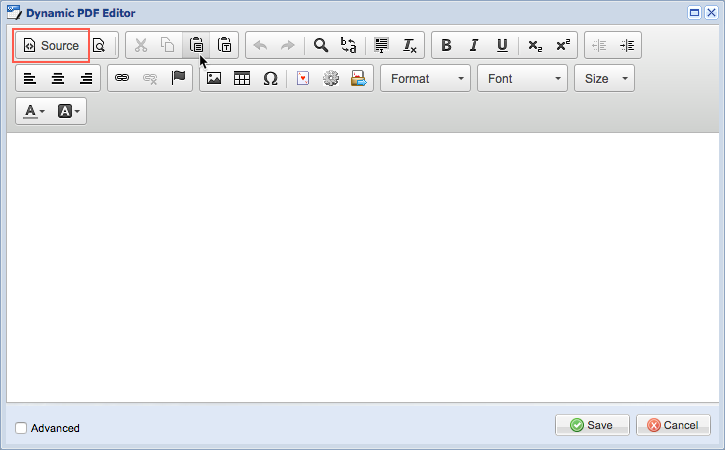
- Now we can edit the header, footer and PDF body. Click the
 Edit Document Body button to launch the editor.
- Within the editor, you can layout the PDF any way you want using your own fonts, styles, colors and the wildcard menu to insert fields from your form.
- For this example, we've provided the HTML you'll need to create the layout.
- Copy the code below to your clipboard.
<!DOCTYPE html><html><head><title></title><style type="text/css">@page{border:5px solid black;}img{border:1px solid gray;padding:5px;}</style></head><body><table border="0"cellpadding="10"cellspacing="1"><tbody><tr><td>showImage([HeadShot],'auto','auto')</td><td style="vertical-align: top;"><span style="font-family:arial,helvetica,sans-serif;"><span style="font-size:20px;"><strong>[Name]</strong></span><br />XYZ Company</span></td></tr><tr><td><span style="font-size:12px;"><span style="font-family:arial,helvetica,sans-serif;"><strong>ALL Day Event Pass (access to all areas)</strong></span></span></td><td> </td></tr></tbody></table></body></html>
- Click the
 Source button in the editor toolbar to switch to source code mode.
- Select all the existing HTML markup and replace with the HTML code provided.
- Click the
 Source button again to switch back to design mode.
- You should see a simple layout that uses the form field values as shown below.
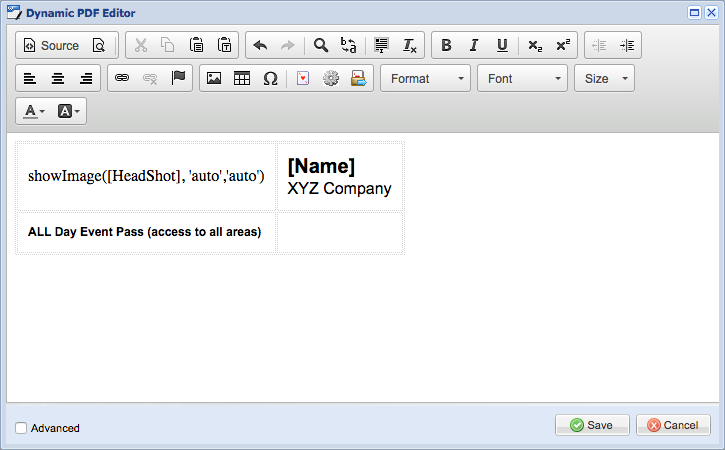
- You should see a simple layout that uses the form field values as shown below.
- Click the
 Save button to close the editor, then click the Finish button complete the setup of the template.
- Now, each time the form is submitted, the PDF will be created and saved in the "Name Badge" field.
- Now, each time the form is submitted, the PDF will be created and saved in the "Name Badge" field.
Now, let's run a test submission and look at the generated PDF.
- Switch back to the Form Designer, then choose
 Preview/Launch > Launch Live Form in a new Window from the Form Designer toolbar.

- Complete and submit the Form. Don't forget to check the 'Attend Meet and Greet" checkbox and upload an image.
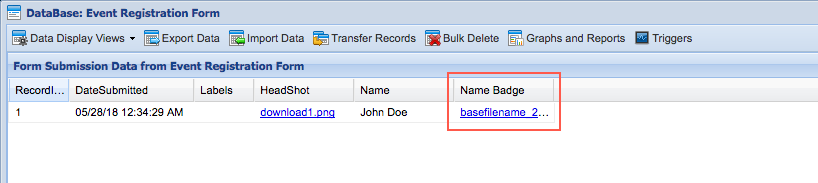
- After submitting the form, close the window, and from the Form Designer toolbar, select the Database option to load the Database.
- From within the Database view, click the filename in the far right column, 'Name Badge,' to view the PDF that was generated
- The generated PDF will look like this example:
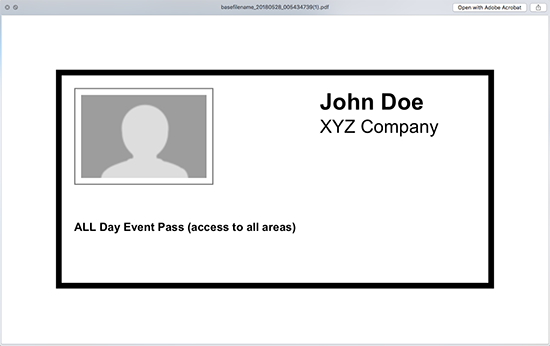
This concludes this tutorial on generating a Dynamic PDF. Remember, the PDF can be attached to an outgoing email or downloaded on demand. In the next step, we'll look at populating a PDF form with the same form submission.
Have more questions? Submit a request
Please sign in to leave a comment.
0 Comments